Continuous Integration Status
![]()
Team Members
- Koichiro Amakasu
- Miron Suarez
- Chloe Teijeiro
- Nathan Vogel
- Kevin Lee
Project Links
Deployment
Overview
Club Oven Lovin’ is a web-based platform that helps college students find, share, and cook affordable, easy-to-make meals using minimal kitchen resources. The system connects students, local vendors, and admins to create a community-driven recipe-sharing space. Students can browse and contribute recipes that include ingredient availability, cost, prep time, servings, and dietary details. Vendors can provide information about ingredient pricing and stock, while admins oversee and manage all site content. This project aims to make healthy, realistic cooking accessible to students with limited resources while supporting local food options.
Goals:
- Implement user authentication and role-based access
- Allow users to register and log in as students, vendors, or admins, each with distinct permissions and access to different system features.
- Create recipe management functionality
- Enable students to:
- Browse, search, and filter recipes by name, tag, ingredients, or dietary needs.
- Add new recipes with descriptions, images, ingredients, and preparation steps.
- Write reviews about other students recipes.
- Allow vendors to:
- Create profiles with store name, location, and hours.
- Add and update ingredient availability, prices, and sizes.
- Link ingredients to recipes automatically.
- Enable admins to:
- Approve, edit, or delete user-submitted recipes.
- Manage user and vendor accounts.
- Establish users as having the vendor role.
- Remove inappropriate or inaccurate content.
- Enable students to:
- Provide basic user guidance
- Help new users understand how to navigate the site and contribute recipes or vendor data.
- Integrate availability tracking
- Automatically calculate:
- Where each ingredient can be found near campus.
- Automatically calculate:
- Develop a recipe search and filtering system
- Allow users to quickly find recipes based on:
- Dietary restrictions (vegan, gluten-free, etc.)
- Tag
- Ingredient availability
- Recipe Name
- Allow users to quickly find recipes based on:
User Guide:
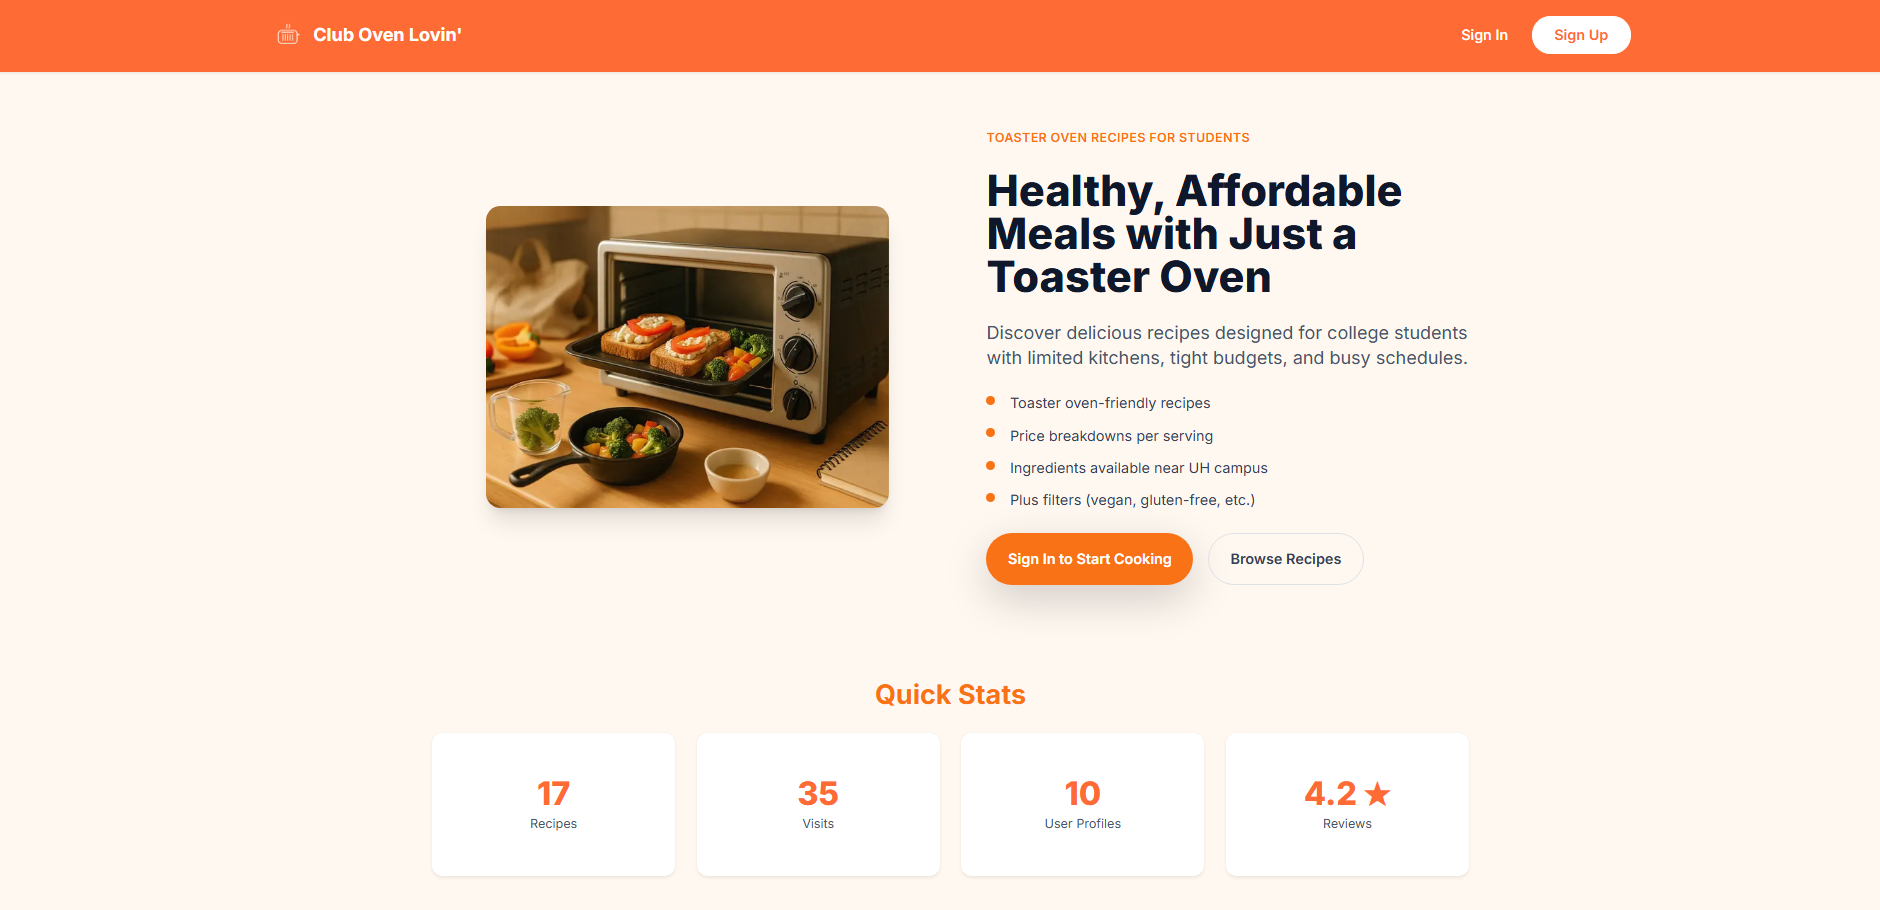
Landing page
- The entry point for all users, providing options to log in, register, and access basic information about the platform and how it works.
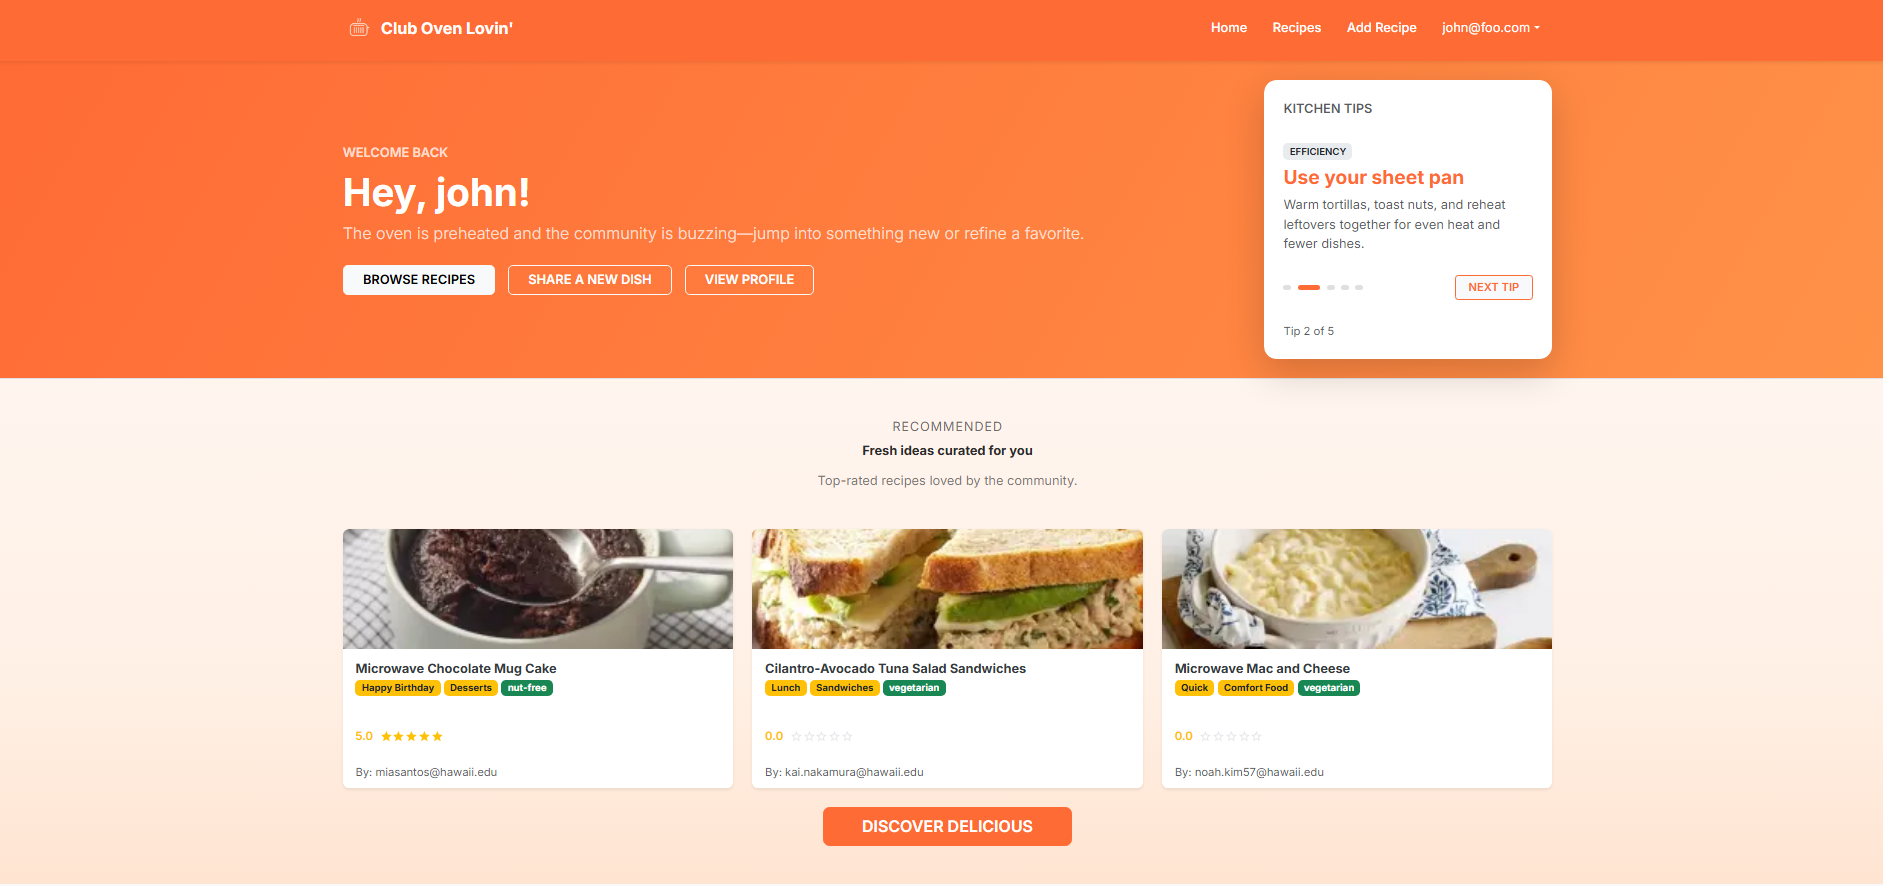
User Home page
- The main dashboard for students, displaying recommended recipes and helpful kitchen tips. From this page, students can quickly browse all recipes, add a new recipe, or view their profile.
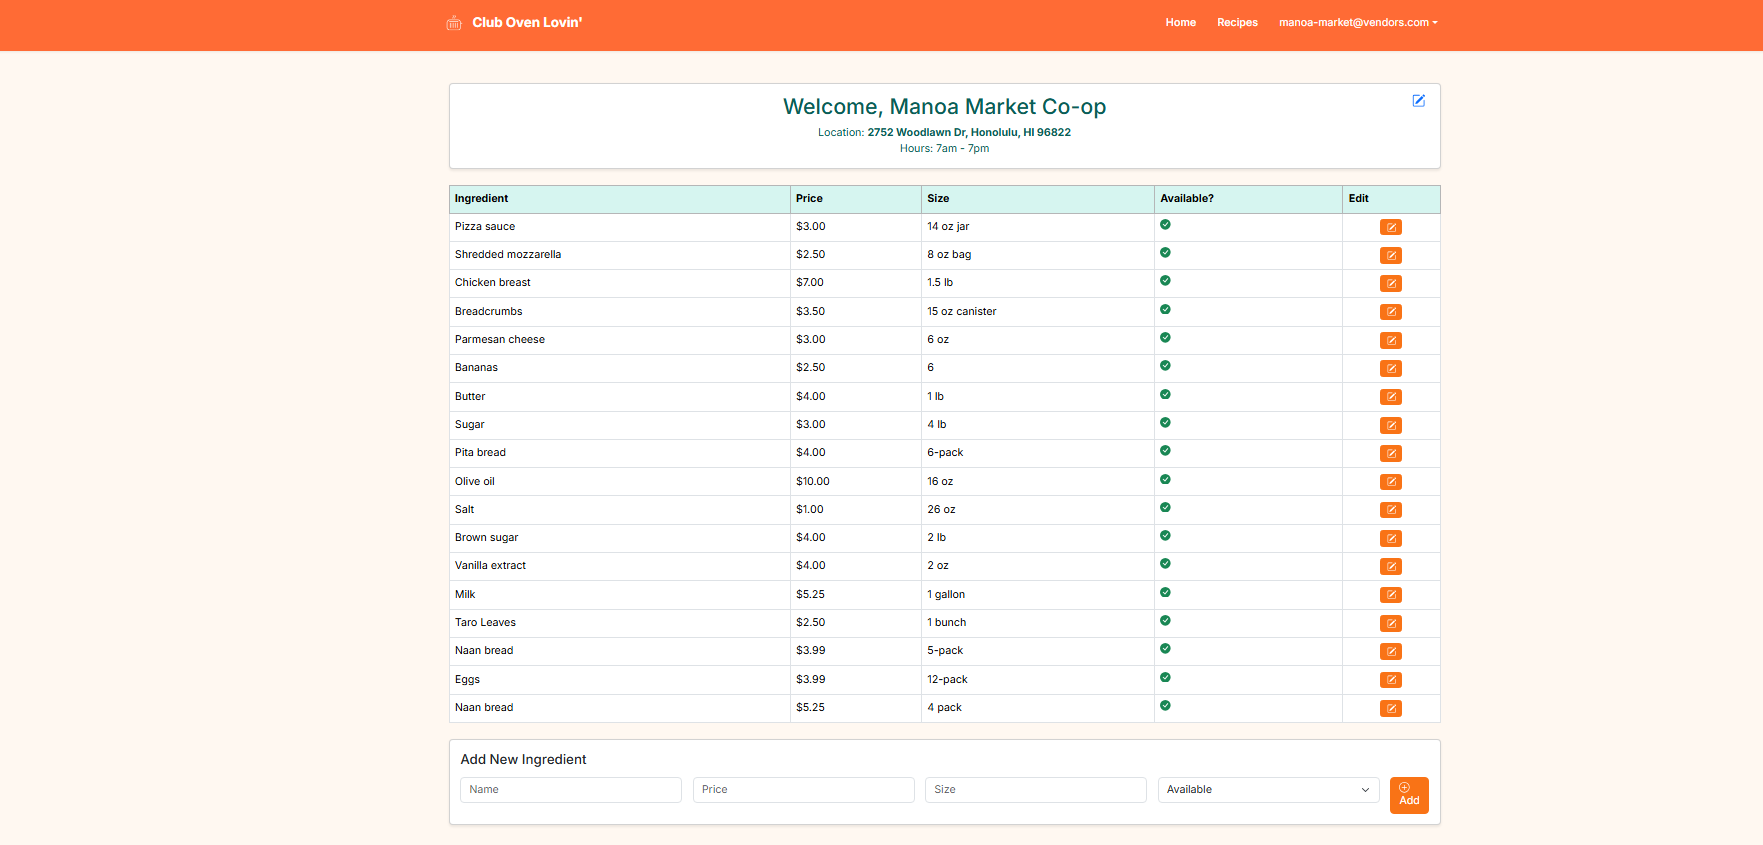
Vendor Dashboard Page
- A dashboard for vendors to view their profile and manage ingredient listings. Vendors can edit their location and hours, add new ingredients, or modify details for existing ones. Each ingredient links to individual recipes that use it.
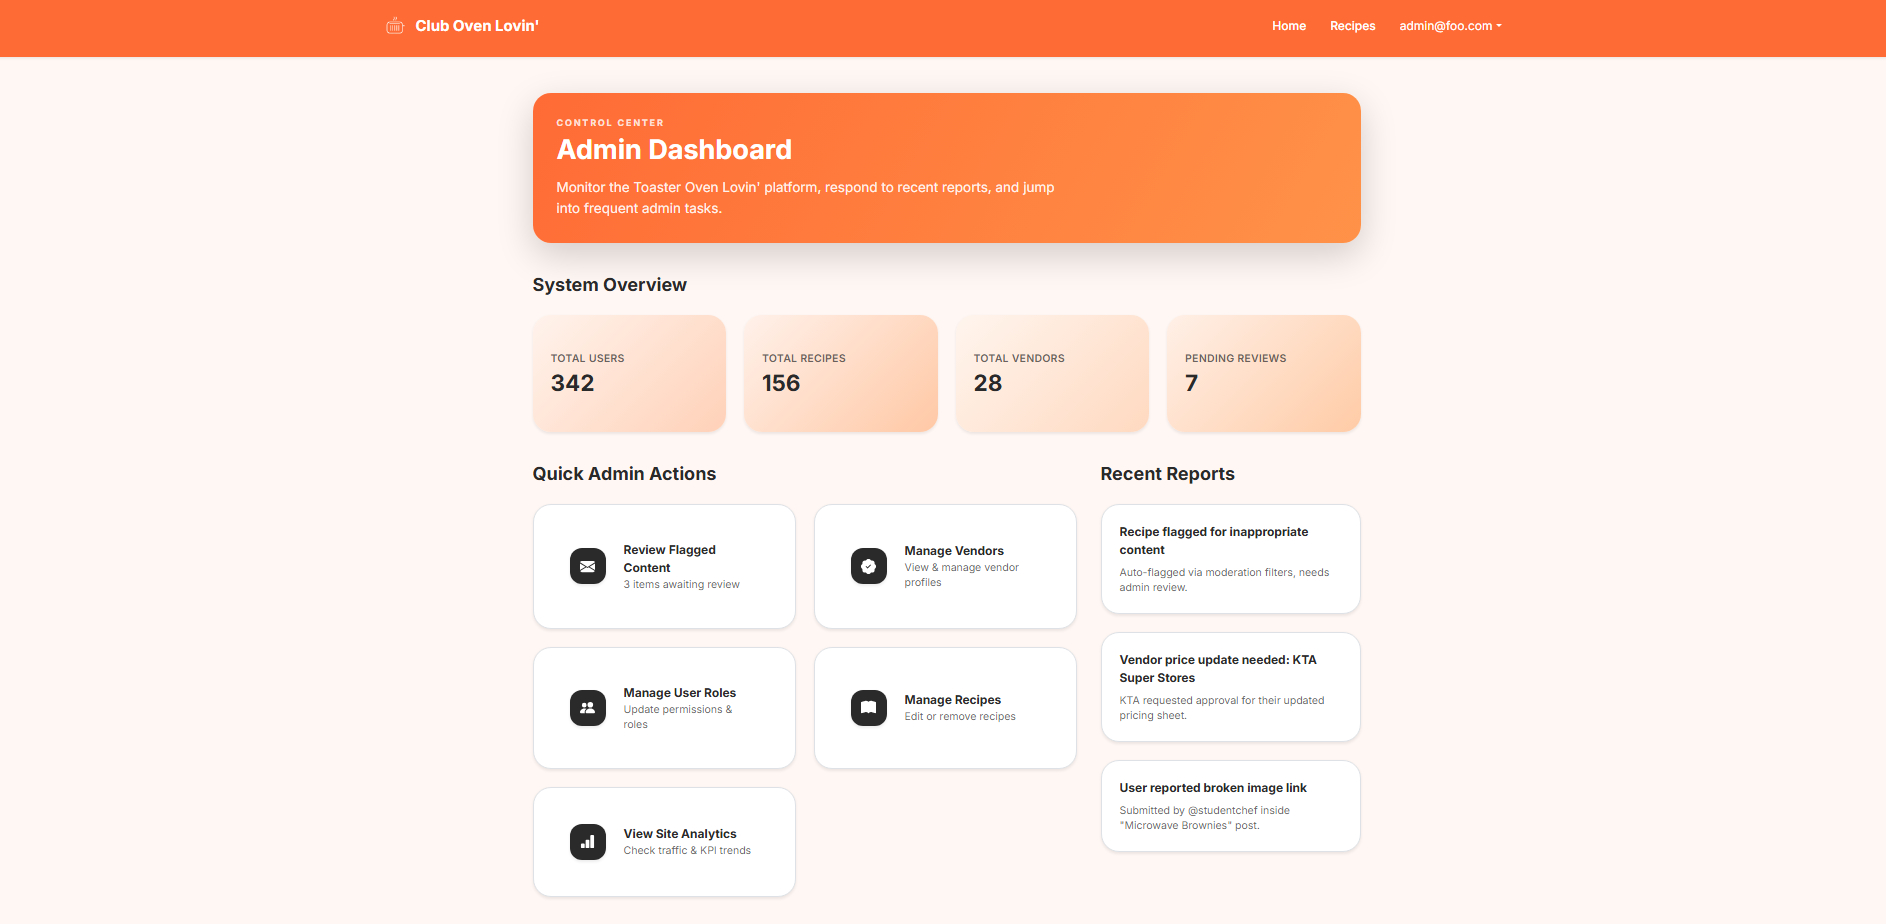
Admin Dashboard Page
- A central dashboard for admins to manage user and vendor accounts, manage recipes, and monitor site content for appropriateness and accuracy.
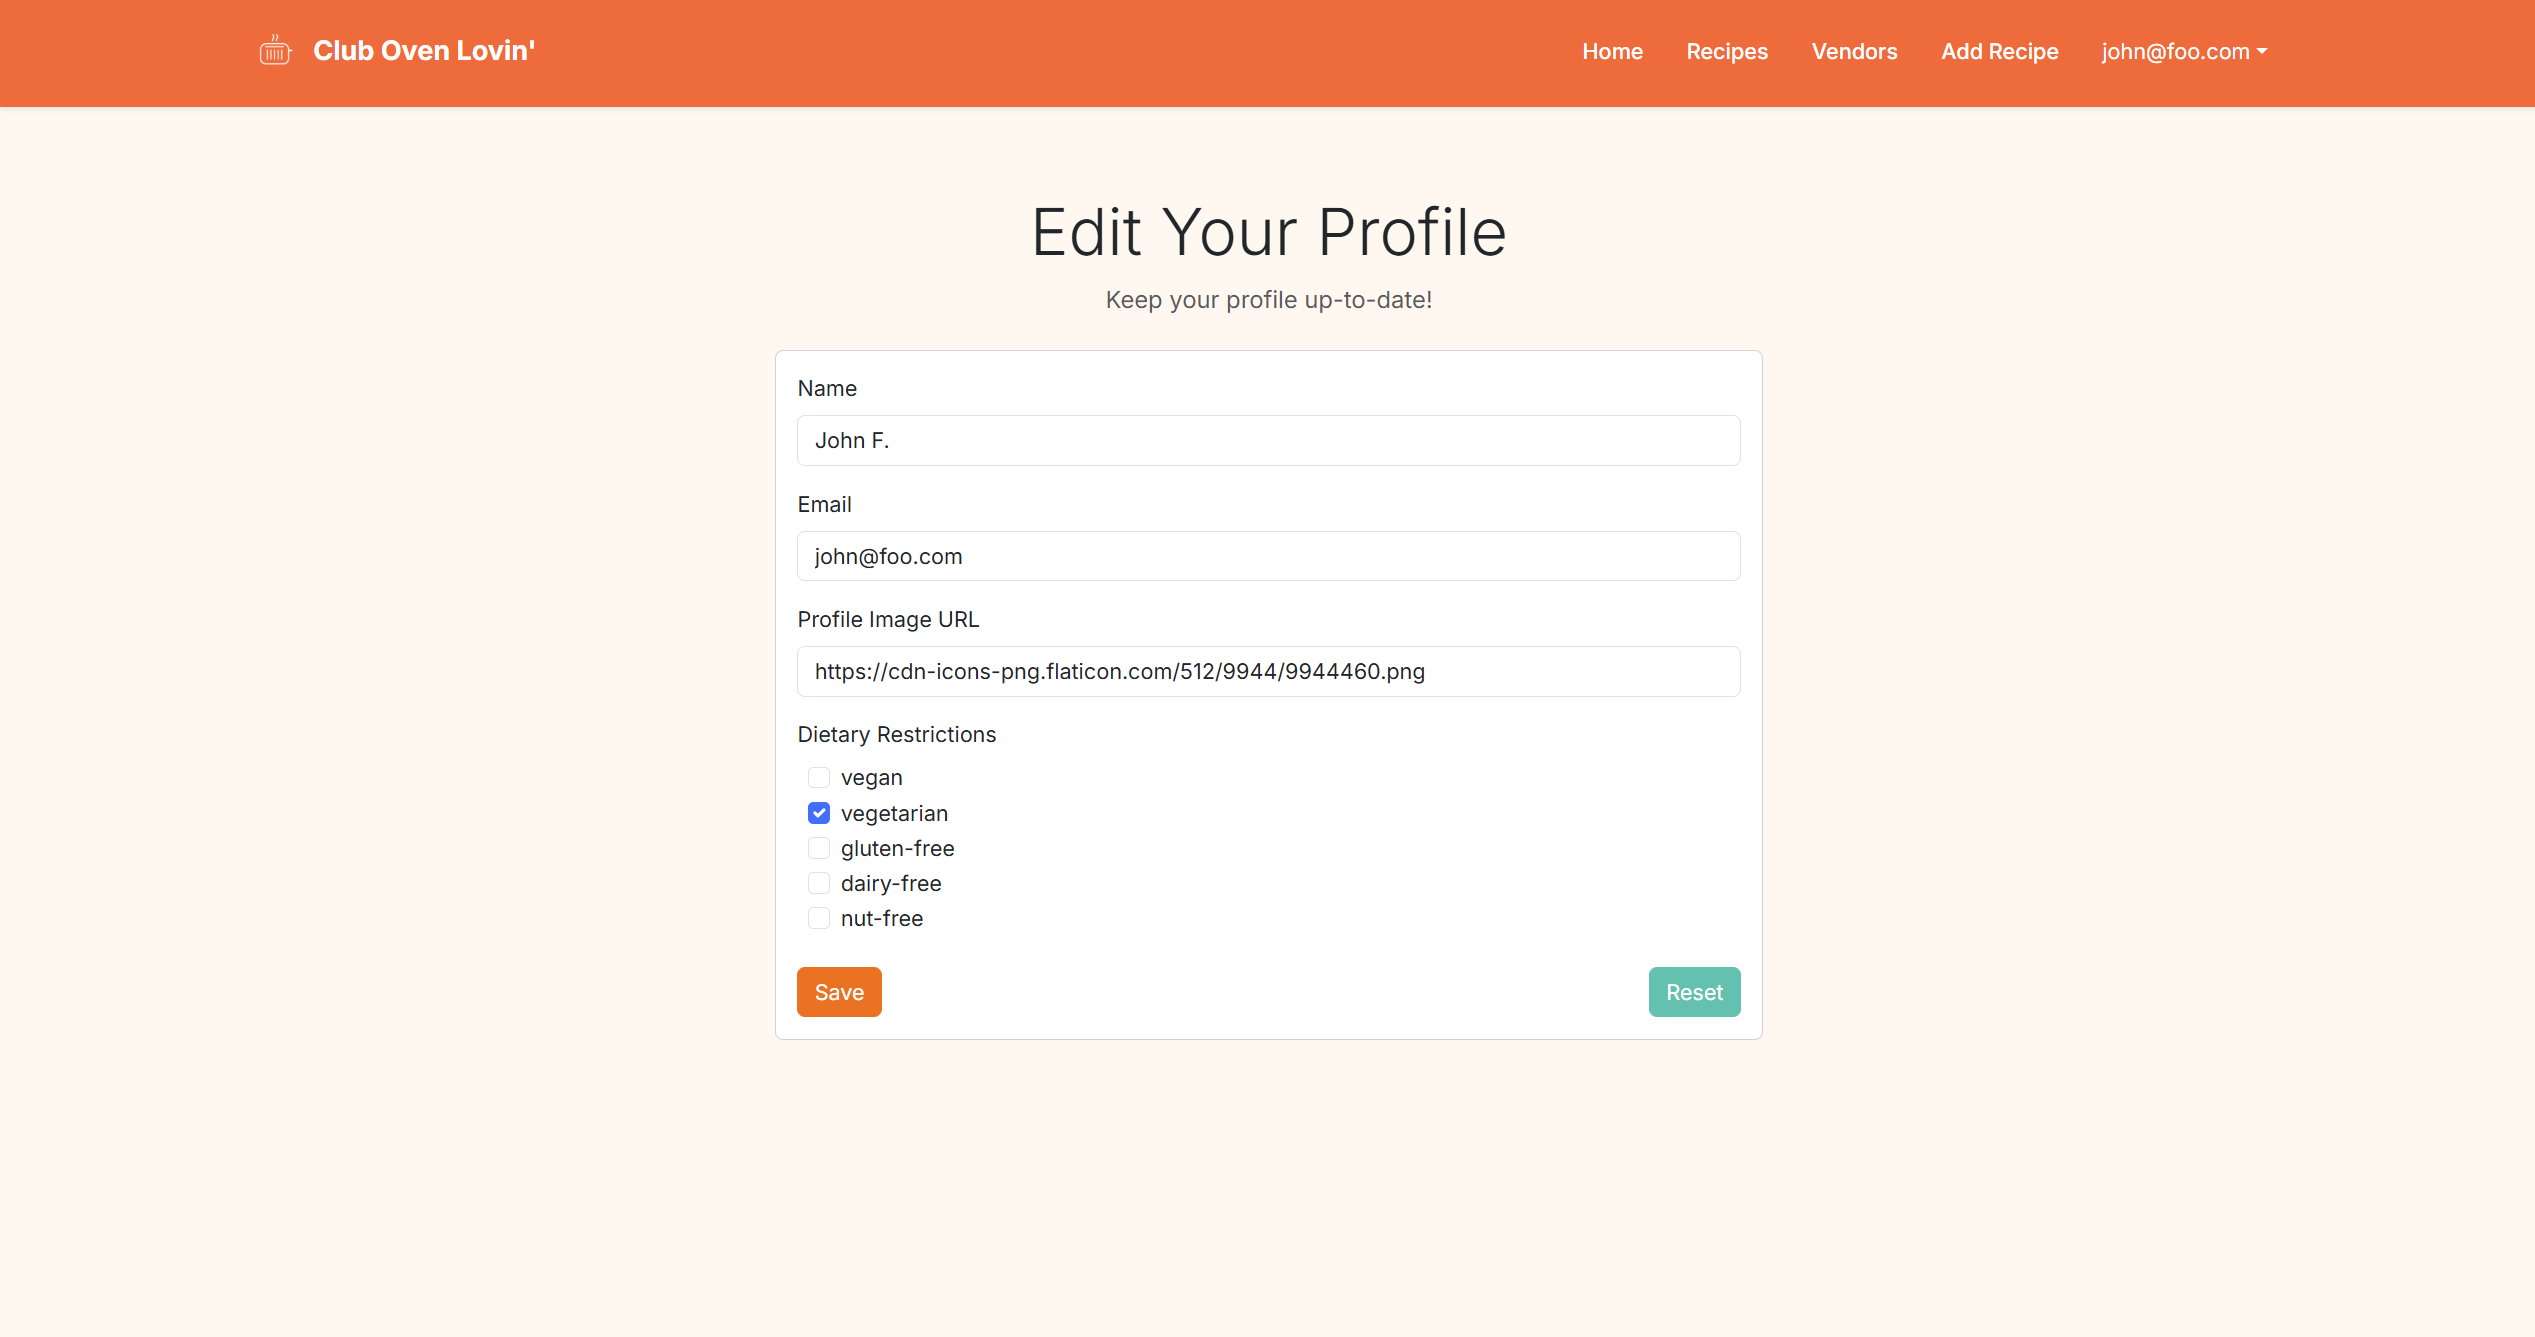
User Profile Page
- Displays a student’s profile picture and personal information, contributed recipes, favorite recipes, and provides access to edit profile details and contributed recipes.
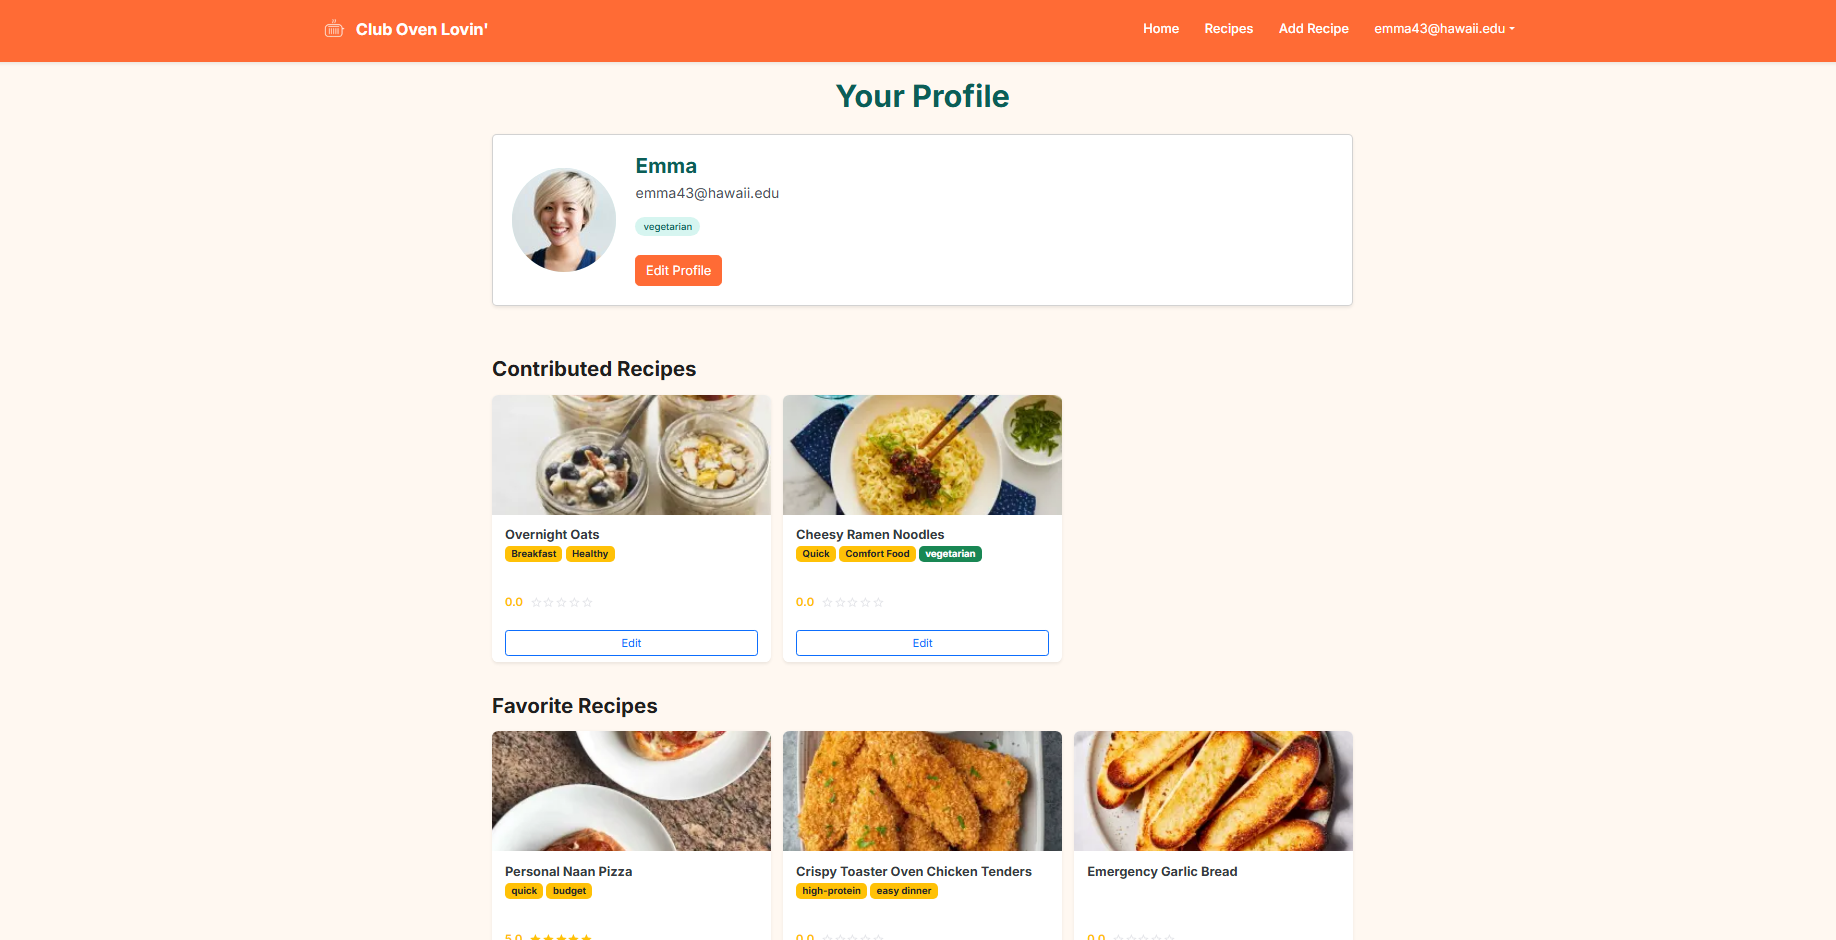
- Allows the student to update personal information and modify dietary preferences.
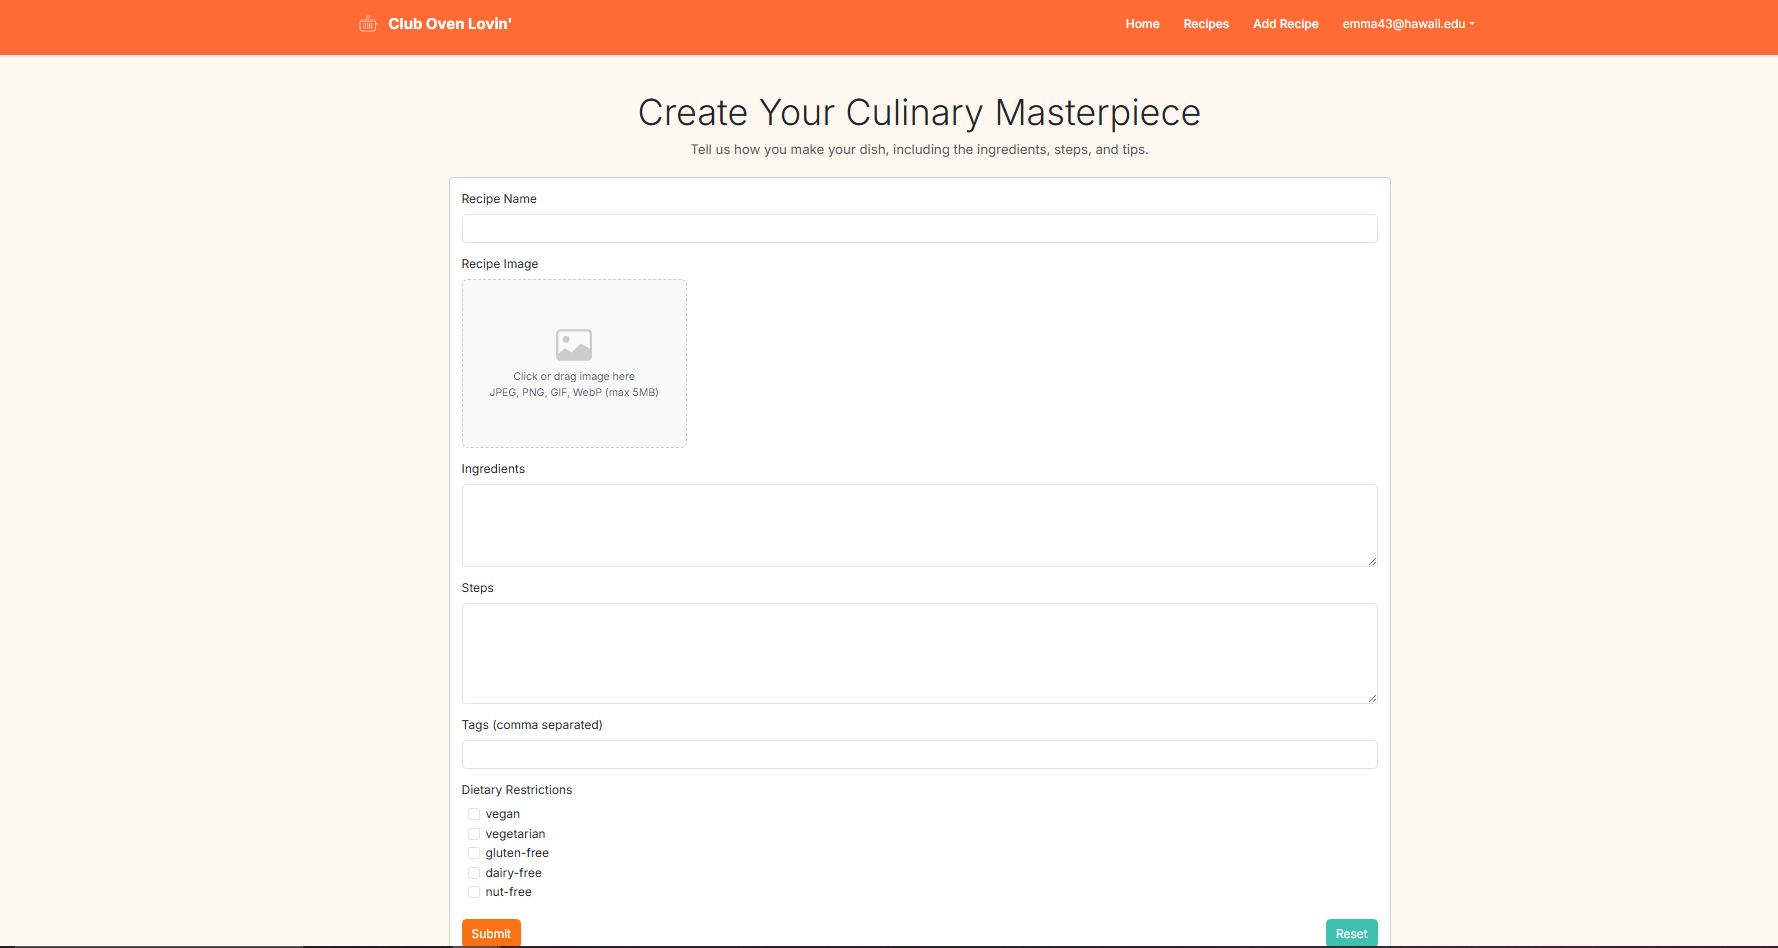
Add Recipe Page
- Displays a form for students to submit a new recipe. The form includes fields for a recipe image, recipe name, ingredients, step-by-step instructions, custom tags, and checkboxes for dietary restriction labels.
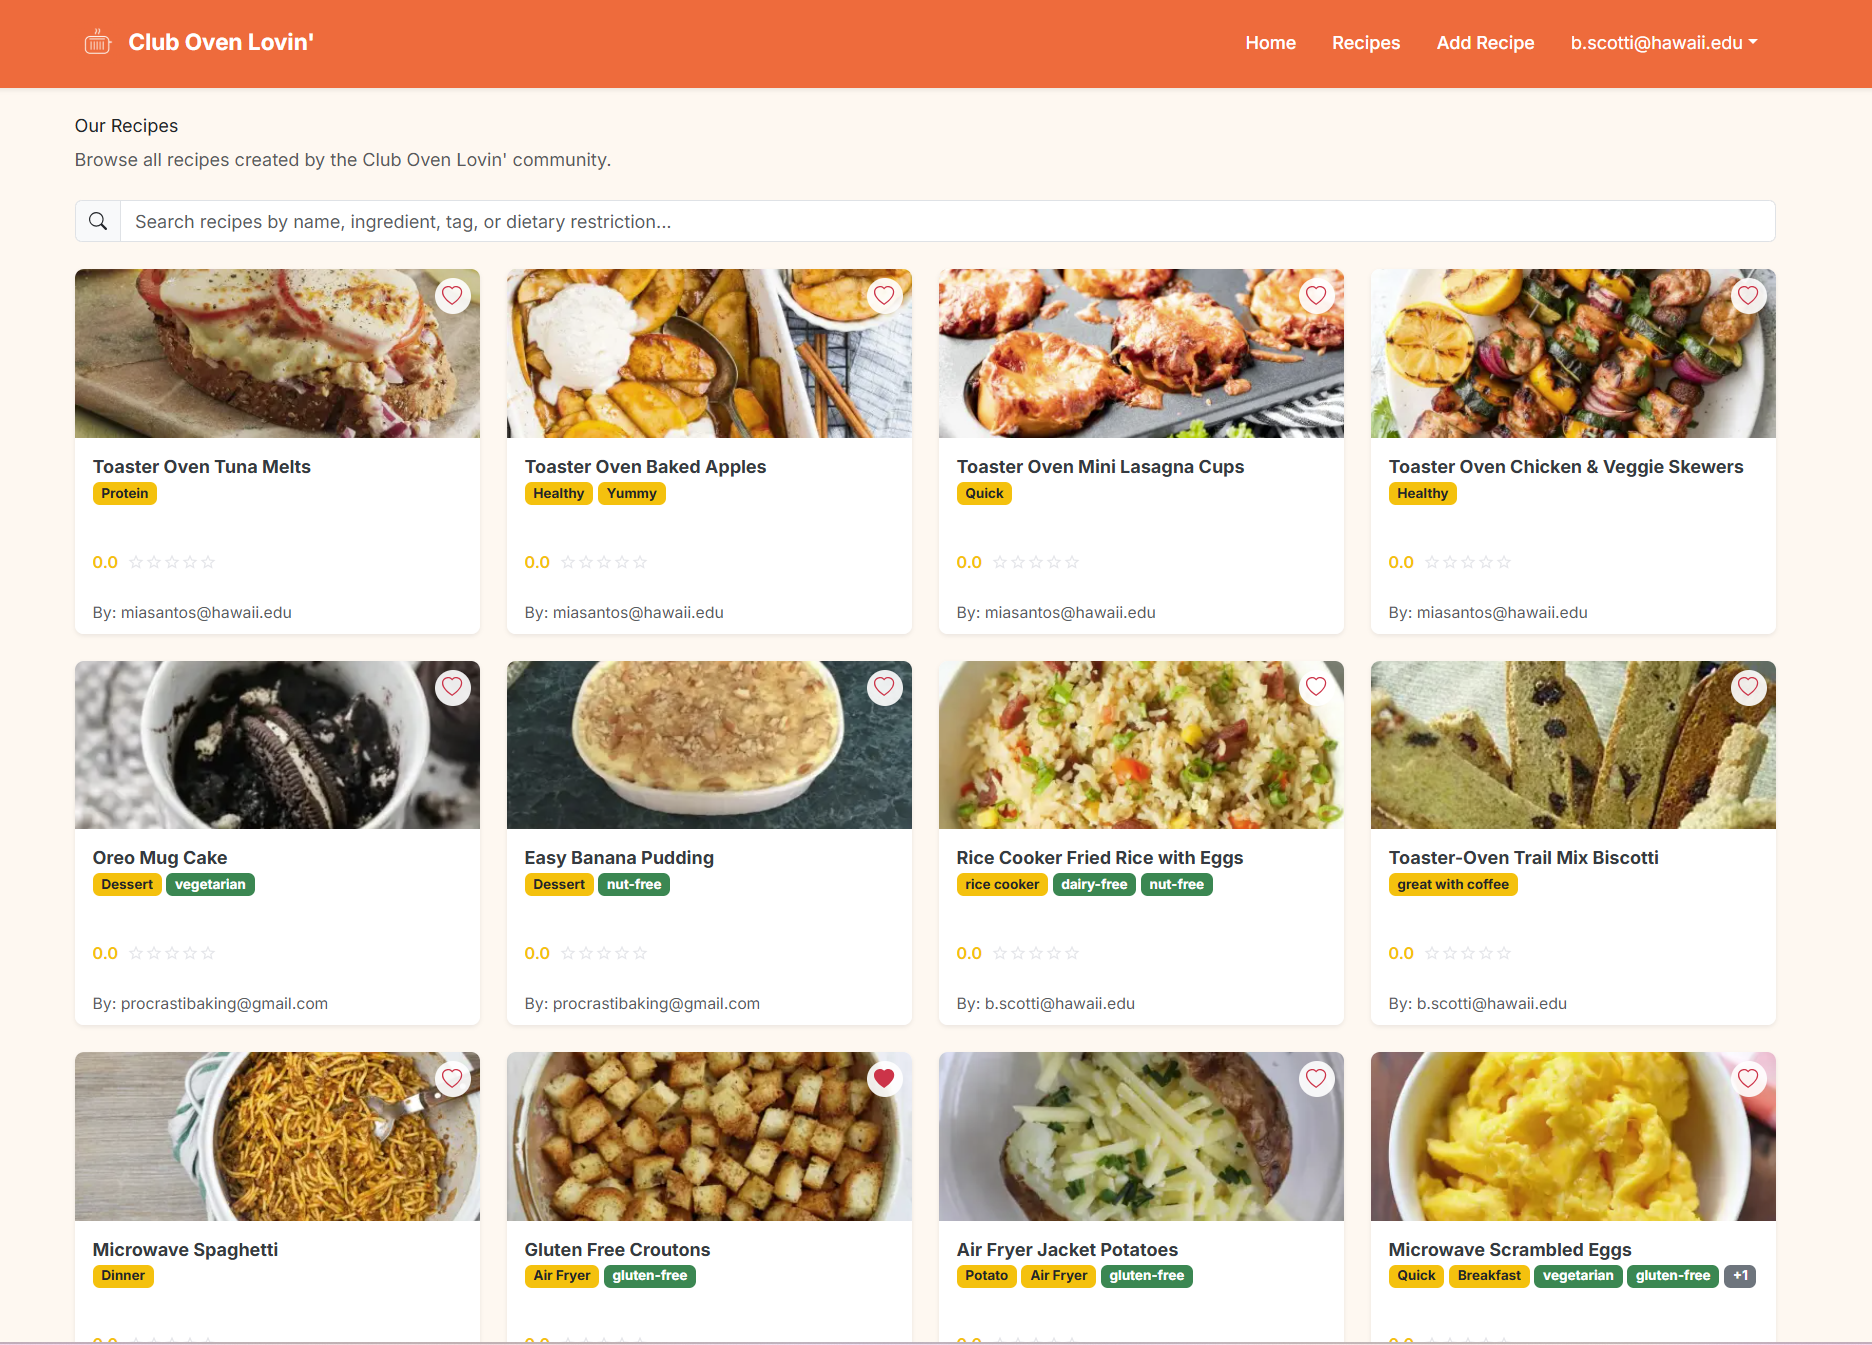
Search Recipes
- Allows users to find recipes using a search bar or by scrolling through all recipes. Users can filter and sort results based on recipe name, ingredients, custom tags, and dietary restrictions.
Individual Recipes
- Shows a complete recipe with ingredients, preparation steps, dietary labels, tags, image, and nearby vendors for each ingredient. Users can favorite a recipe, edit or delete their own recipes, and add reviews.
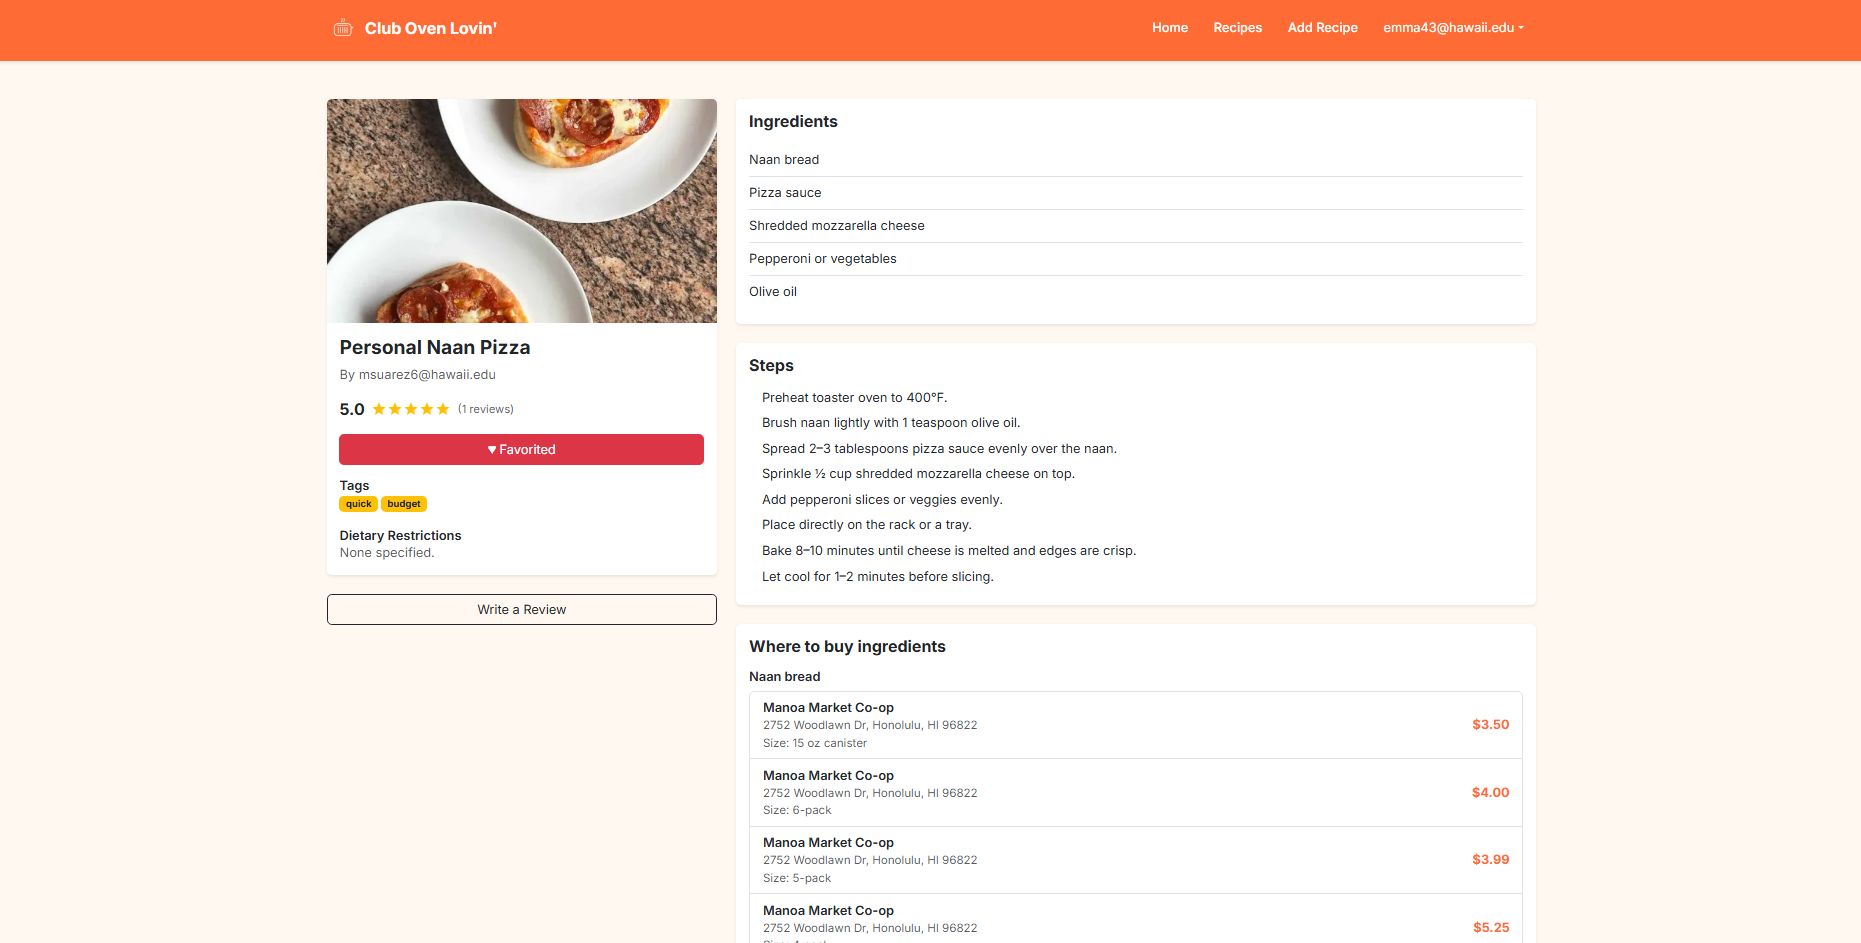
- Allows users to rate a recipe out of 5 stars and leave a comment.

Community Feedback
Things That Were Liked
-
Relatable, welcoming experience
The landing hero, quick stats, and personalized greetings make the app feel active, student-focused, and welcoming right away. -
Strong dietary awareness
Dietary badges on profiles and recipe cards make it easy to identify vegetarian, nut-free, and dairy-free options at a glance. -
Effective search and filtering foundations
Search supports ingredients, tags, and dietary flags, helping users narrow recipes to fit their needs quickly. -
High-quality recipe and vendor integration
Recipe detail pages break down ingredients and show nearby vendors with prices, which is especially useful for planning and budgeting.
Constructive Criticism
-
Search flexibility could be improved
Search requires all words to match and ignores short terms, which can make it difficult to find common abbreviations (e.g., “PB,” “ramen”). -
Incorporate cook time
Recipes do not currently include a cook time, making it harder for users to compare and choose meals based on time constraints. -
Expand filtering by review rating Recipes cannot currently be filtered by review rating, limiting users’ ability to quickly find highly rated or low-rated recipes (e.g., 1-star or 5-star).
-
Autosave or draft support for contributors
Contributors risk losing work when creating long recipes, especially on mobile or unstable connections.
Developer Guide:
This guide is to help developers get up and running with Club Oven Lovin, including setup, running, and making changes.
1. System Requirements
Before starting, make sure you have:
- Node.js v18 or later
- npm (comes with Node.js)
- Git
- Visual Studio Code (or another code editor)
- PostgreSQL (local or Vercel-hosted)
- A modern browser such as Chrome, Firefox, or Safari
2. Get the Source Code
Clone the repository locally:
git clone https://github.com/<your-org>/club-oven-lovin.git
Navigate into the project directory:
cd club-oven-lovin
3. Set Up Environment Variables
Create a .env file in the project root and include the following:
NEXTAUTH_URL=http://localhost:3000
NEXTAUTH_SECRET=your-secret-here

POSTGRES_DATABASE=verceldb
POSTGRES_HOST=your-host
POSTGRES_USER=default
POSTGRES_PASSWORD=your-password
POSTGRES_PRISMA_URL=postgres://...

DATABASE_URL=${POSTGRES_PRISMA_URL}
If you plan to deploy to Vercel, set these environment variables in the Settings > Environment Variables section.
4. Install Dependencies
Run:
npm install
5. Database Setup
Generate the Prisma client:
npx prisma generate
Apply the database schema:
npx prisma db push
Optionally, populate the database with sample data:
npx prisma db seed
6. Run Locally
Start the development server:
npm run dev
Open the app in your browser at:
http://localhost:3000
7. Project Overview
- app/ — main pages and routes
- components/ — reusable UI components
- lib/ — utilities, authentication, Prisma setup
- prisma/ — database schema and seed files
- public/ — static files and images
- styles/ — global styling
8. Making Changes
Pages
Add new pages under app/. Example:
app/new-page/page.tsx
Components
Add or update components in:
components/
Database
Edit the schema in:
prisma/schema.prisma
Then run:
npx prisma db push
npx prisma generate
API Routes
Add or update routes in:
app/api/
Authentication
Handled in:
lib/authOptions.ts
You can modify sign-in/session behavior or restrict access by role.